Follow Me On Social Media!


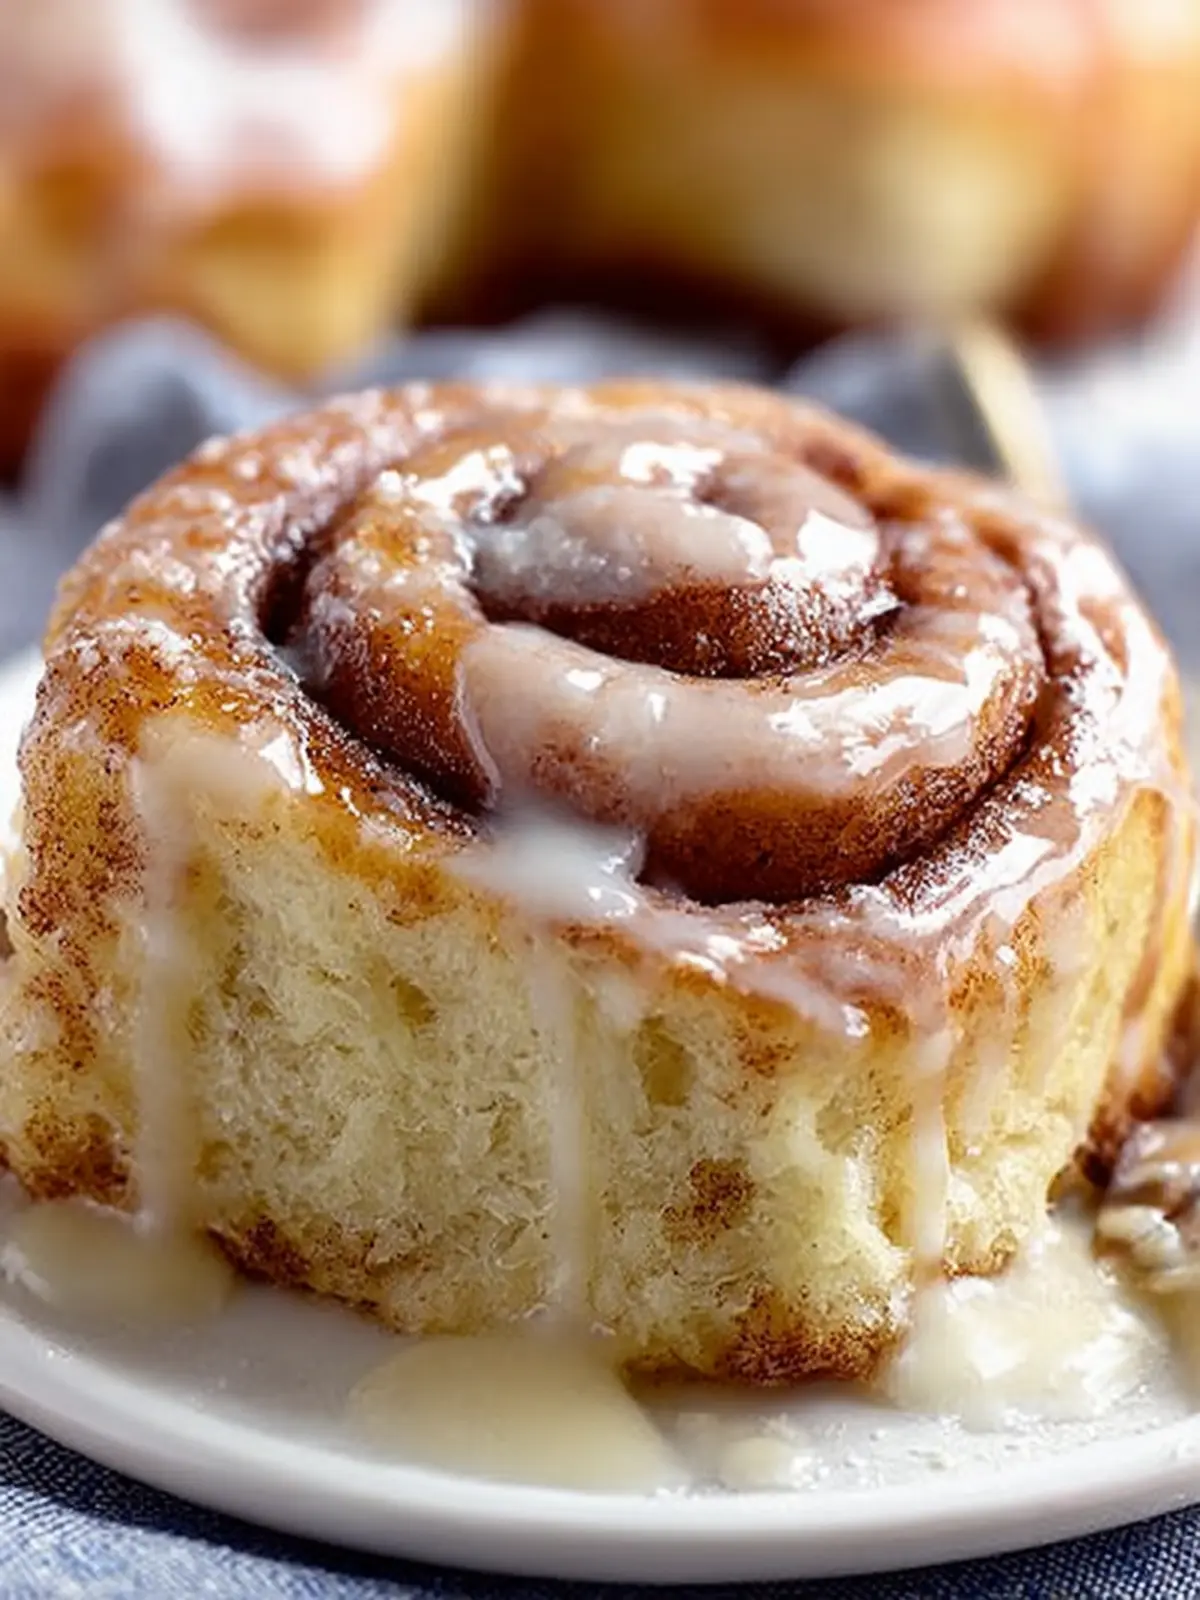
Gluten Free Cinnamon Rolls: Indulgent, Fluffy, and Easy to Make
Introduction to Gluten Free Cinnamon Rolls
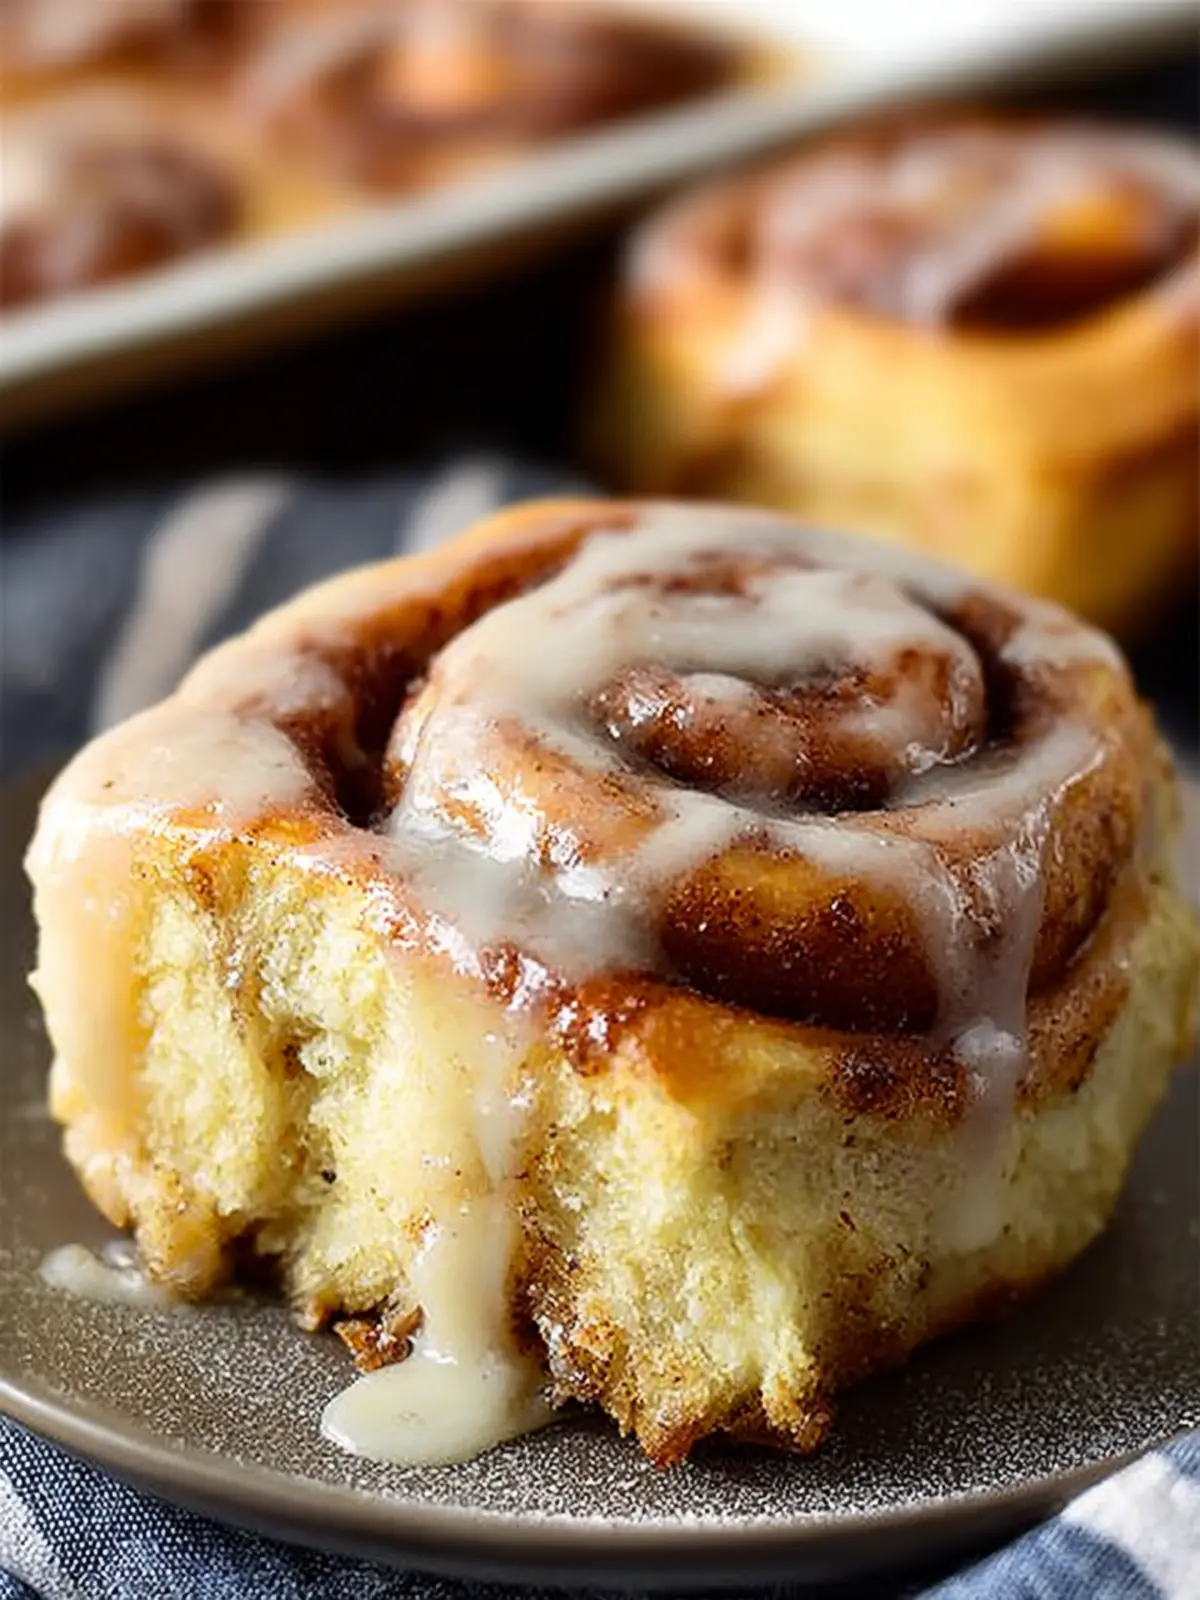
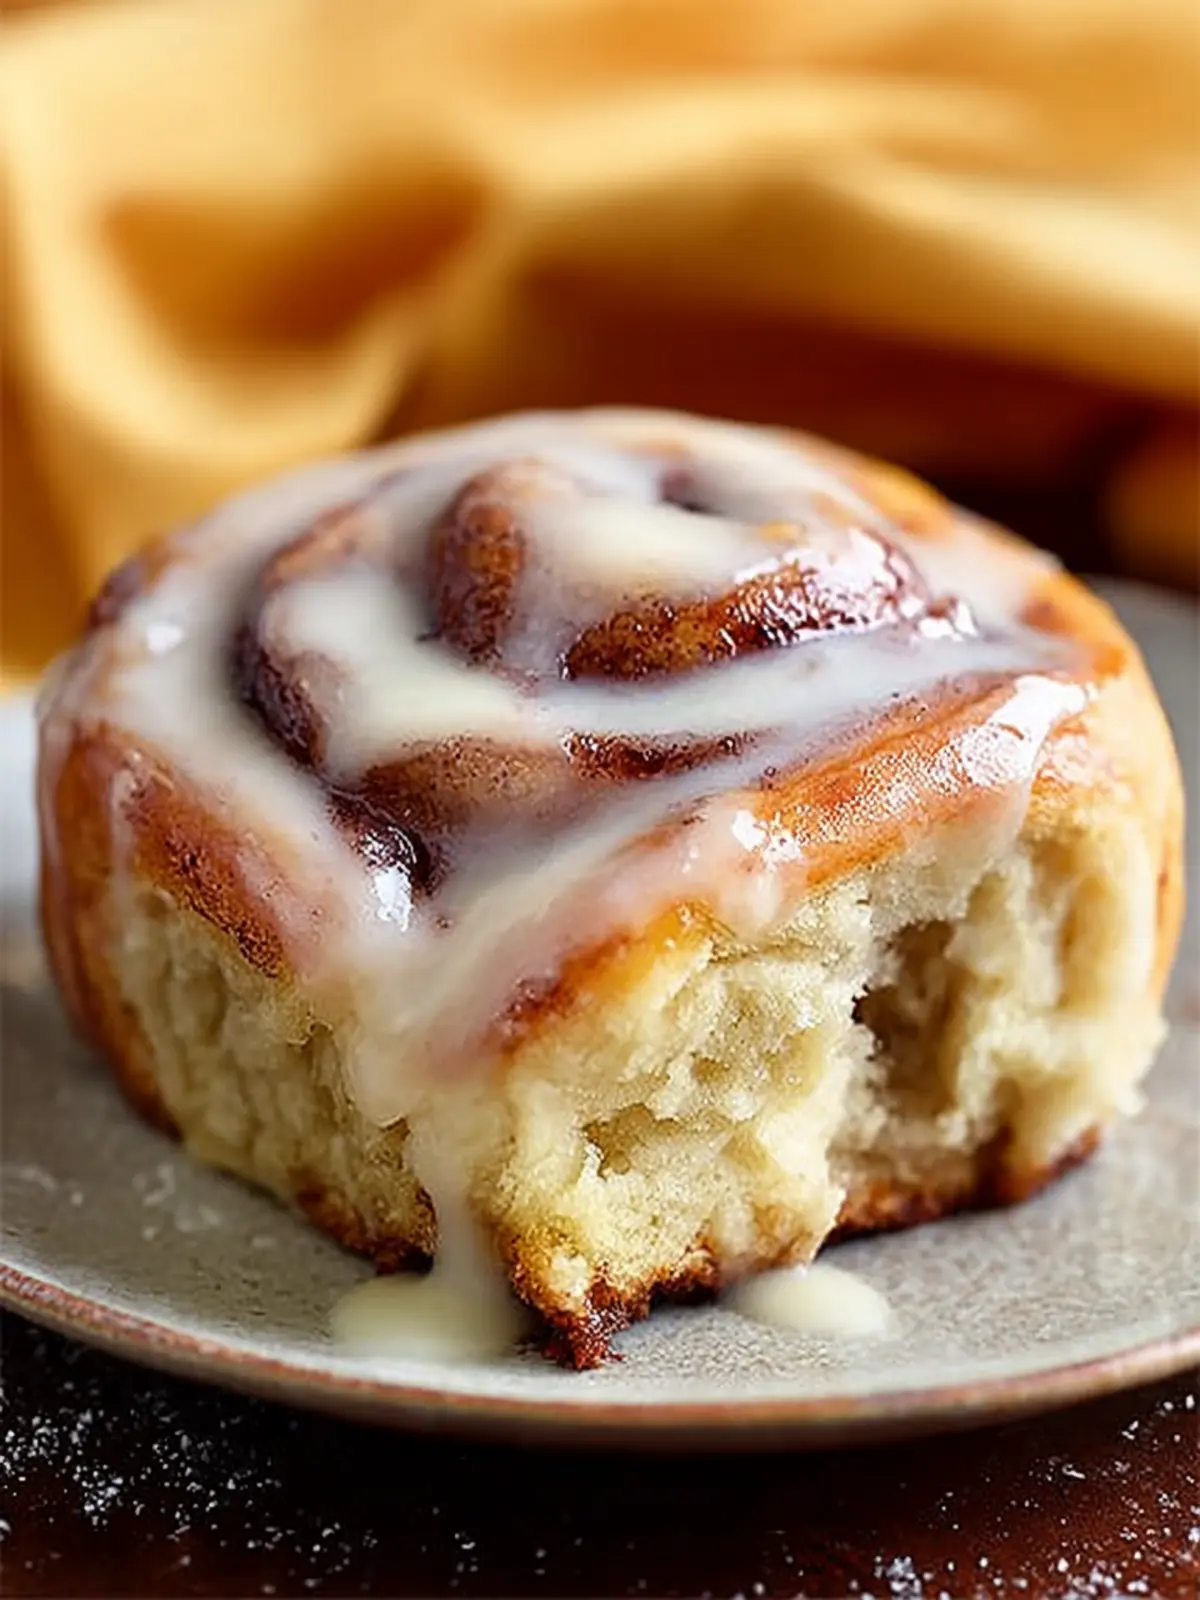
Imagine waking up to the warm aroma of freshly baked gluten free cinnamon rolls wafting through your kitchen. Picture a leisurely weekend morning where you can savor the delightful blend of cinnamon and sugar, topped with a creamy glaze that drips gently down the sides. These rolls are not just for those avoiding gluten; they are a treat for anyone looking for a delicious breakfast or dessert option that pleases the palate and warms the heart.
What makes gluten free cinnamon rolls a delightful treat? First, it’s the comforting texture and flavor that lures us in. Made with a careful selection of gluten-free flours and wholesome ingredients, these cinnamon rolls maintain the same soft, pillowy consistency you expect from their gluten-filled counterparts. Plus, the combination of spices creates an inviting warmth that instantly elevates any meal.
Gluten free cinnamon rolls are versatile too! You can whisk them up for a cozy Sunday brunch, serve them during special occasions, or even enjoy a lazy Wednesday treat. Not only do they cater to gluten sensitivities, but they also serve as a wonderful centerpiece for gatherings—imagine your friends and family gathered around the table, eyes lighting up as they take their first delicious bite.
These rolls are easy to make and chock-full of flavor. Using a blend of gluten-free flours, you’ll notice how the dough develops a perfectly chewable texture. The aroma that fills the air while they bake is simply irreplaceable, bringing everybody to the kitchen in anticipation. The crispy edges combined with a soft, gooey center are what make this treat truly unforgettable.
So, whether you’re gluten-free by choice or necessity, these gluten free cinnamon rolls promise satisfaction in every sweet, spiced bite. Let’s dive into the ingredients and see how we can bring this delightful treat to life!
Key Ingredients for Gluten Free Cinnamon Rolls
Butter or Vegan Butter: I embrace the rich flavor of butter in my gluten free cinnamon rolls, but for those seeking a dairy-free alternative, vegan butter is perfectly suitable. It lends a delightful tenderness to the dough and amplifies the overall taste of these rolls, ensuring they’re irresistibly soft and flavorful.
Milk: Warm milk is essential for activating the yeast and achieving that soft, tender dough we crave in cinnamon rolls. Whether you choose dairy or a plant-based milk, just ensure it’s warmed to the right temperature to get the yeast bubbling effectively.
Sugar: A mixture of granulated and powdered sugar strikes the ideal balance of sweetness. Sugar is not only vital for activating the yeast but also contributes to a lovely, tender texture that makes each bite of your gluten free cinnamon rolls melt in your mouth.
Quick Rise Instant Yeast: This fast-acting yeast works wonders, allowing the dough to rise quickly without the long waits. It’s a game-changer for achieving that fluffy texture in your rolls.
Gluten-Free Baking Flour Blend: Opting for a high-quality gluten-free blend, like Cup4Cup, ensures our rolls hold together beautifully without gluten. The presence of binders in the flour plays a crucial role in their structure.
Cinnamon: Naturally, the star of the show! Cinnamon infuses warmth and sweetness into these rolls, creating that classic cozy flavor we all adore. Its aromatic presence elevates the entire experience of enjoying gluten free cinnamon rolls.
Why You’ll Love This Recipe
If you’ve ever dreamt of indulging in warm, gooey gluten free cinnamon rolls without the guilt or discomfort of gluten, this recipe is your culinary dream come true. Imagine waking up to the comforting aroma of cinnamon cascading through your home, instantly lifting your spirits. These rolls are not only delicious; they are a testament to the fact that eating gluten-free doesn’t have to mean sacrificing flavor or texture.
-
Fluffy and Delicious: Thanks to a perfect mix of gluten-free flour, our rolls achieve that soft, pillowy quality everyone craves in a cinnamon roll. Every bite is a delight, and the delicate texture will have you raving about them even if you don’t follow gluten-free eating.
-
Comfort Food Made Healthier: Using wholesome ingredients ensures that you can enjoy these treats without feeling heavy afterward. The addition of yogurt or nut milk adds moisture while keeping them light.
-
Simple and Fun to Make: Baking these gluten free cinnamon rolls is not just easy but also a fun activity! Whether you’re preparing for family brunch or hosting friends, it’s a perfect occasion to get creative in the kitchen.
Trust me; once you try these homemade rolls, they’ll become a staple in your recipe repertoire. Enjoying a slice of life has never tasted this good.
Tips for Making Perfect Gluten Free Cinnamon Rolls
Creating gluten free cinnamon rolls that are fluffy, gooey, and absolutely delicious is a rewarding experience that will impress even those who can enjoy regular rolls. Here are some tried-and-true tips to ensure your rolls come out perfect every time.
Choose the Right Flour Blend
Using a high-quality gluten-free flour blend is the key to achieving that soft, pillowy texture. Look for blends that contain xanthan gum or add a teaspoon of it yourself to mimic the elasticity usually provided by gluten. Just make sure it’s not too gritty, as that can affect the final product.
Don’t Skip the Rising Time
Patience is a virtue, especially for gluten free cinnamon rolls. Allowing the dough to rise adequately helps it develop flavor and texture. A warm, draft-free spot is ideal; I recommend covering the dough with a clean kitchen towel for an uninterrupted rise.
Get Your Filling Just Right
For the filling, a mixture of brown sugar, cinnamon, and a touch of melted butter works wonders. The key is to spread it evenly over the dough, ensuring every bite is packed with that sweet, cozy flavor. Don’t be afraid to experiment with additional flavors like nutmeg or even a hint of vanilla to make it uniquely yours.
Bake Low and Slow
Baking your cinnamon rolls at a lower temperature ensures that they cook evenly without getting overly brown on the outside. Keep an eye on them during the last few minutes and pull them out once they’re golden brown and just firm to the touch.
By following these simple tips, your gluten free cinnamon rolls will be a delightful treat that everyone will love!
Time Details for Gluten Free Cinnamon Rolls
When you set out to make gluten free cinnamon rolls, it’s not merely about the ingredients—it’s an experience that unfolds over time. You’ll find that each phase brings its own delightful anticipation.
Preparation time
This stage requires about 20 minutes, where all the ingredients come together, allowing you to savor the initial aromatic encounter of cinnamon and sugar.
Rising time
Patience is key here; the dough needs about 60 minutes to rise. This is when the magic begins as the yeast works its charm, creating a soft and airy dough.
Baking time
Once risen, baking takes around 25–30 minutes. The sweet aroma will waft through your kitchen, making it hard to resist.
Total time
From start to finish, expect about 1 hour and 50 minutes, including preparation, rising, and baking. Each moment contributes to the joy of enjoying those warm, delicious gluten free cinnamon rolls.

Nutritional Information for Gluten Free Cinnamon Rolls
When it comes to indulging in delectable gluten free cinnamon rolls, it’s essential to be mindful of their nutritional content! These irresistible treats not only satisfy your sweet cravings but also support your dietary preferences. Let’s dive into the nutritional details to help you enjoy them with confidence.
Calories
Each serving of these gluten free cinnamon rolls packs around 250 calories. This makes them a delightful, moderate choice for a snack or dessert aimed at staying mindful yet indulging.
Protein
For those seeking a protein boost, these rolls provide roughly 3 grams of protein per serving, which contributes to a balanced diet while tantalizing your taste buds.
Sodium
With about 200 mg of sodium per serving, these rolls are a reasonable option when considering your sodium intake, allowing you to enjoy this treat without straying too far from your daily limit.
As you savor these gluten free cinnamon rolls, you can feel good knowing you have made a smart choice that accommodates your dietary needs!
FAQs about Gluten Free Cinnamon Rolls
Baking gluten free cinnamon rolls is not just a culinary task; it’s a delightful adventure that fills your kitchen with the warm, aromatic scent of cinnamon sugar and gooey frosting. If you’re navigating this sweet journey for the first time, you might have some questions. Let’s address them!
Can I make these cinnamon rolls dairy-free?
Absolutely! To create dairy-free gluten free cinnamon rolls, simply substitute the butter with a plant-based alternative like coconut oil or dairy-free butter. For the milk, almond milk, oat milk, or any other dairy-free milk will work wonderfully. These substitutions won’t compromise the flavor or texture, allowing everyone to enjoy a warm treat.
How can I store leftover cinnamon rolls?
If you find yourself with leftover gluten free cinnamon rolls (and trust me, it happens!), you can store them in an airtight container at room temperature for up to two days. For longer freshness, wrap them individually in plastic wrap and place them in the freezer. When you’re ready to indulge, simply reheat them in the microwave for a few seconds or pop them in the oven at a low temperature until they warm up.
What do I do if my yeast doesn’t foam?
Seeing that yeast bubbling and foaming is a crucial step in making gluten free cinnamon rolls. If your yeast doesn’t foam, it’s likely that your liquid was too hot or too cold, or the yeast may be expired. For best results, use lukewarm water (about 110°F) and ensure your yeast is fresh. Remember, patience is key. If it doesn’t foam after ten minutes, it might be time to start over with a new batch of yeast. Happy baking!
Conclusion on Gluten Free Cinnamon Rolls
Creating the perfect gluten free cinnamon rolls can be a delightful experience, turning a cozy kitchen into a haven of warmth and sweetness. As you savor each bite of fluffy rolls swirled with cinnamon and sugar, you’ll appreciate how easy it is to adapt classic recipes for gluten-free lifestyles. Baking isn’t just about following a recipe; it’s about bringing joy to your table.
Remember, whether you’re a seasoned baker or just starting out, these rolls invite you to experiment with flavors and techniques. Don’t be afraid to make them your own—after all, the best part of cooking is sharing delicious moments with friends and family! Enjoy the scrumptiousness that comes from making food that everyone can enjoy together.
Print
Gluten-Free Cinnamon Rolls
- Total Time: 1 hour 35 minutes
- Yield: 12 rolls 1x
- Diet: Gluten-Free
Description
Delicious gluten-free cinnamon rolls topped with a sweet icing. Perfect for breakfast or a sweet treat!
Ingredients
Scale
- 1/4 cup butter or vegan butter
- 1 cup milk (see notes)
- 1/3 cup + 1 Tablespoon sugar (divided)
- 1 packet quick rise instant yeast
- 1 large egg (whisked)
- 2–1/2 cups high quality gluten free baking flour blend with binder (Cup4Cup recommend, see notes)
- 2 teaspoons baking powder
- 1/4 teaspoon salt
- 1/2 cup sugar
- 2 Tablespoons cinnamon
- 1/3 cup butter or vegan butter (extremely soft)
- 2 Tablespoons butter or vegan butter
- 1 cup powdered sugar
- 1/2 teaspoon vanilla
- 1–1/2 Tablespoons hot water
Instructions
- Add butter to a large glass bowl then melt in the microwave. Add milk and 1 Tablespoon sugar then microwave for an additional 45-50 seconds, stir with a spatula, and take a temperature using an instant read thermometer – we’re looking for 110 degrees. Sprinkle in yeast then stir gently and let sit until foamy, 8 minutes. (If your mixture does not foam, likely your yeast was old and/or the temperature of the milk mixture was too cool or too warm.) Add whisked egg and remaining 1/3 cup sugar then stir gently to combine.
- Meanwhile, in another bowl add gluten-free flour blend, baking powder, and salt then stir with a fork to combine. Add to wet ingredients in two batches, stirring until flour is just incorporated (small lumps remaining are fine) before adding the next batch. Dough should be very soft but not overly sticky – kind of like sugar cookie dough. Cover with a tea towel then set somewhere warm to double in volume, 1 hour. I use my oven’s “bread proof” setting, though placing the pan on a heating pad set to warm, or placing in a warm sunny spot will also work. Your dough may not rise if it’s not in a warm enough spot.
- Combine sugar and cinnamon from filling recipe in a small bowl then set aside. Spray a 9” pie plate with nonstick spray then set aside.
- Scrape the dough onto a large sheet of parchment paper that’s been lightly sprayed with nonstick spray then, with lightly oiled hands, spread dough into a 1/4” thick rectangle, roughly 10×14”. THE KEY TO SUCCESSFULLY SLICING THIS DOUGH IS TO NOT PRESS IT TOO THIN.
- Using your fingers, gently spread softened butter over the dough, leaving 1” clear on the bottom. Sprinkle the cinnamon sugar mixture evenly on top, avoiding the clear strip of dough then, using the parchment paper, gently roll the dough from the top down towards you. Continue to roll the dough into a log using the parchment paper instead of your hands until you reach the bottom. Lightly pinch the seams of the dough together then slice the log into quarters using a sharp knife in one slicing motion vs sawing at the dough. Wipe off knife in between cuts as necessary and/or dip knife in flour blend to prevent sticking. Slice each quarter into thirds for 12 slices total then arrange the slices in the prepared pie plate. Since the dough will be very soft, it helps to use the knife to re-slice and scrape each roll off the parchment paper and into the pan.
- Place rolls somewhere warm to rise until puffy, 30-40 minutes. Again, I use my oven’s “bread proof” setting. During the last 10 minutes of rising time, preheat oven to 350 degrees. Bake rolls for 16-20 minutes, or until golden brown on top, rotating the pan 180 degrees halfway through.
- Let rolls cool for 15 minutes then make the icing. (If you ice them while they’re too hot they’ll absorb all the icing.) Add ingredients for the icing in a bowl then whisk vigorously until smooth. Spoon icing on top of the rolls then serve. Rolls are best the day they’re made but leftovers can be stored in the refrigerator and microwaved for 20-25 seconds uncovered to warm back up.
Notes
- Read post in its entirety before making.
- Ensure your yeast is fresh for the best results.
- Serve warm for the best flavor.
- Prep Time: 15 minutes
- Cook Time: 20 minutes
- Category: Dessert
- Method: Baking
- Cuisine: American
Nutrition
- Serving Size: 1 roll
- Calories: 210
- Sugar: 8g
- Sodium: 150mg
- Fat: 6g
- Saturated Fat: 3g
- Unsaturated Fat: 3g
- Trans Fat: 0g
- Carbohydrates: 32g
- Fiber: 1g
- Protein: 3g
- Cholesterol: 35mg