Follow Me On Social Media!


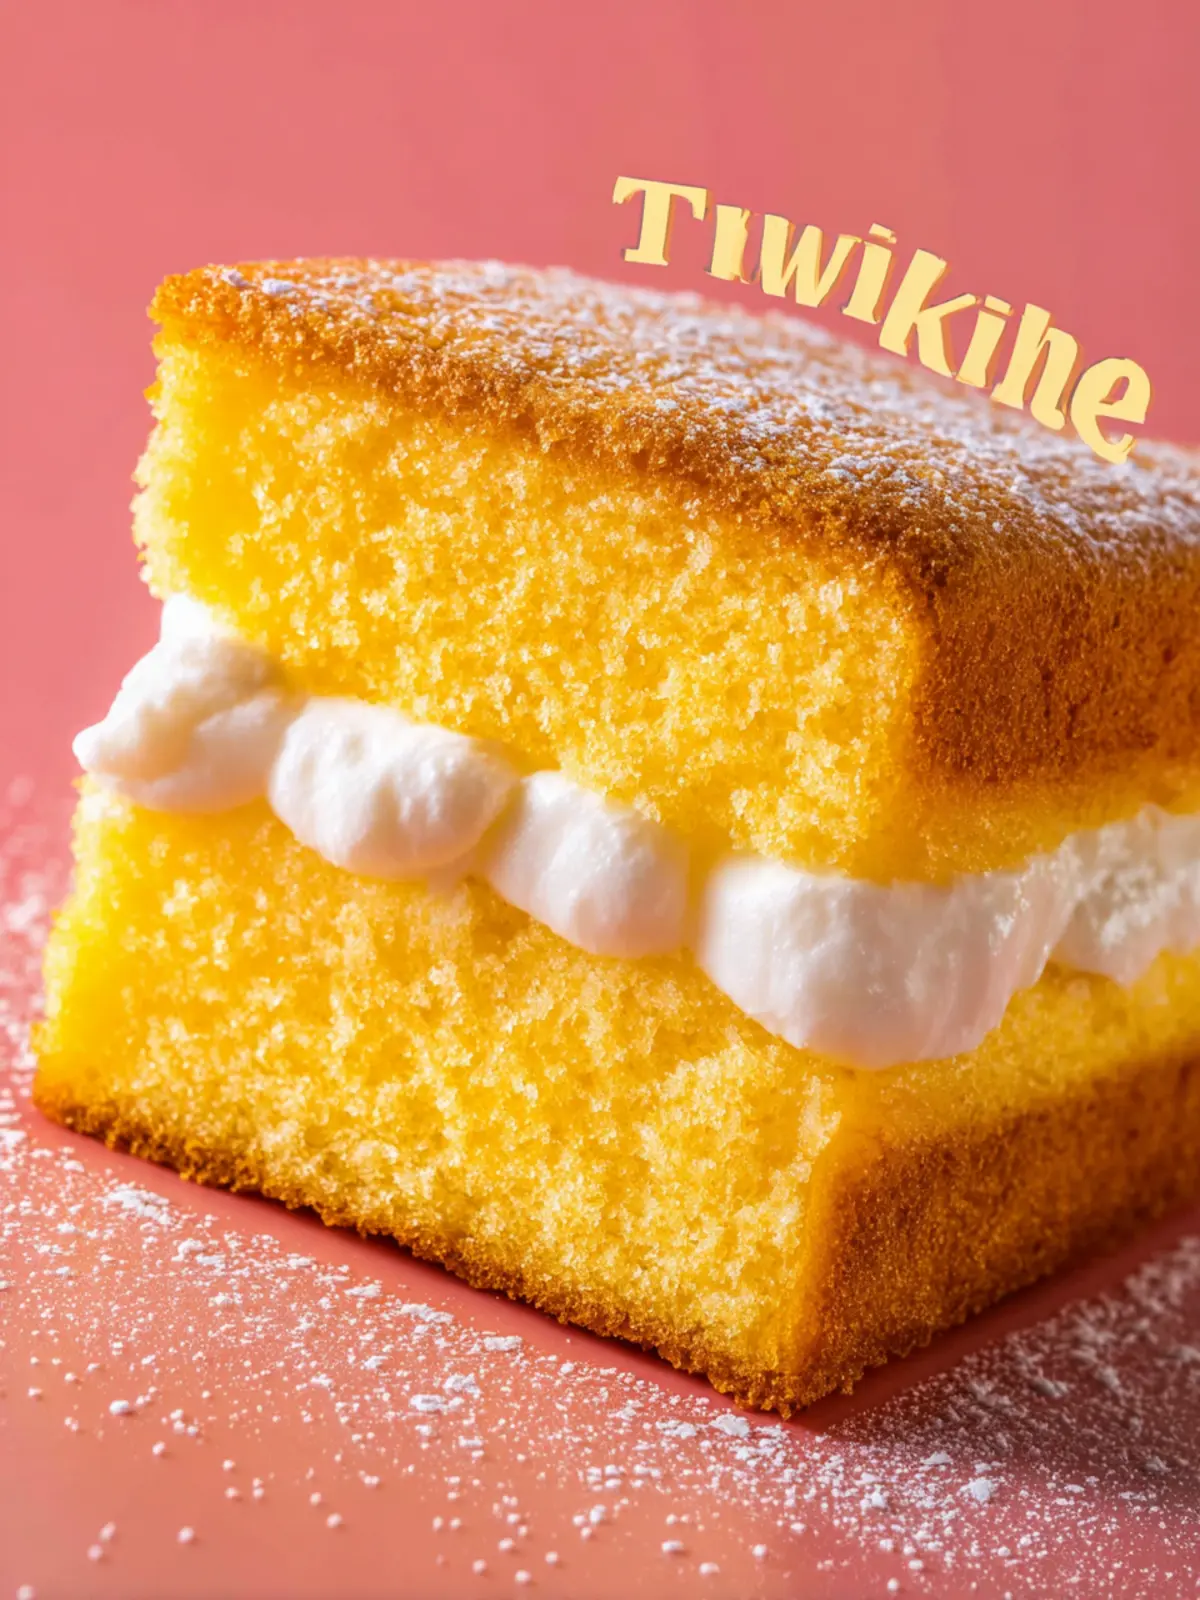
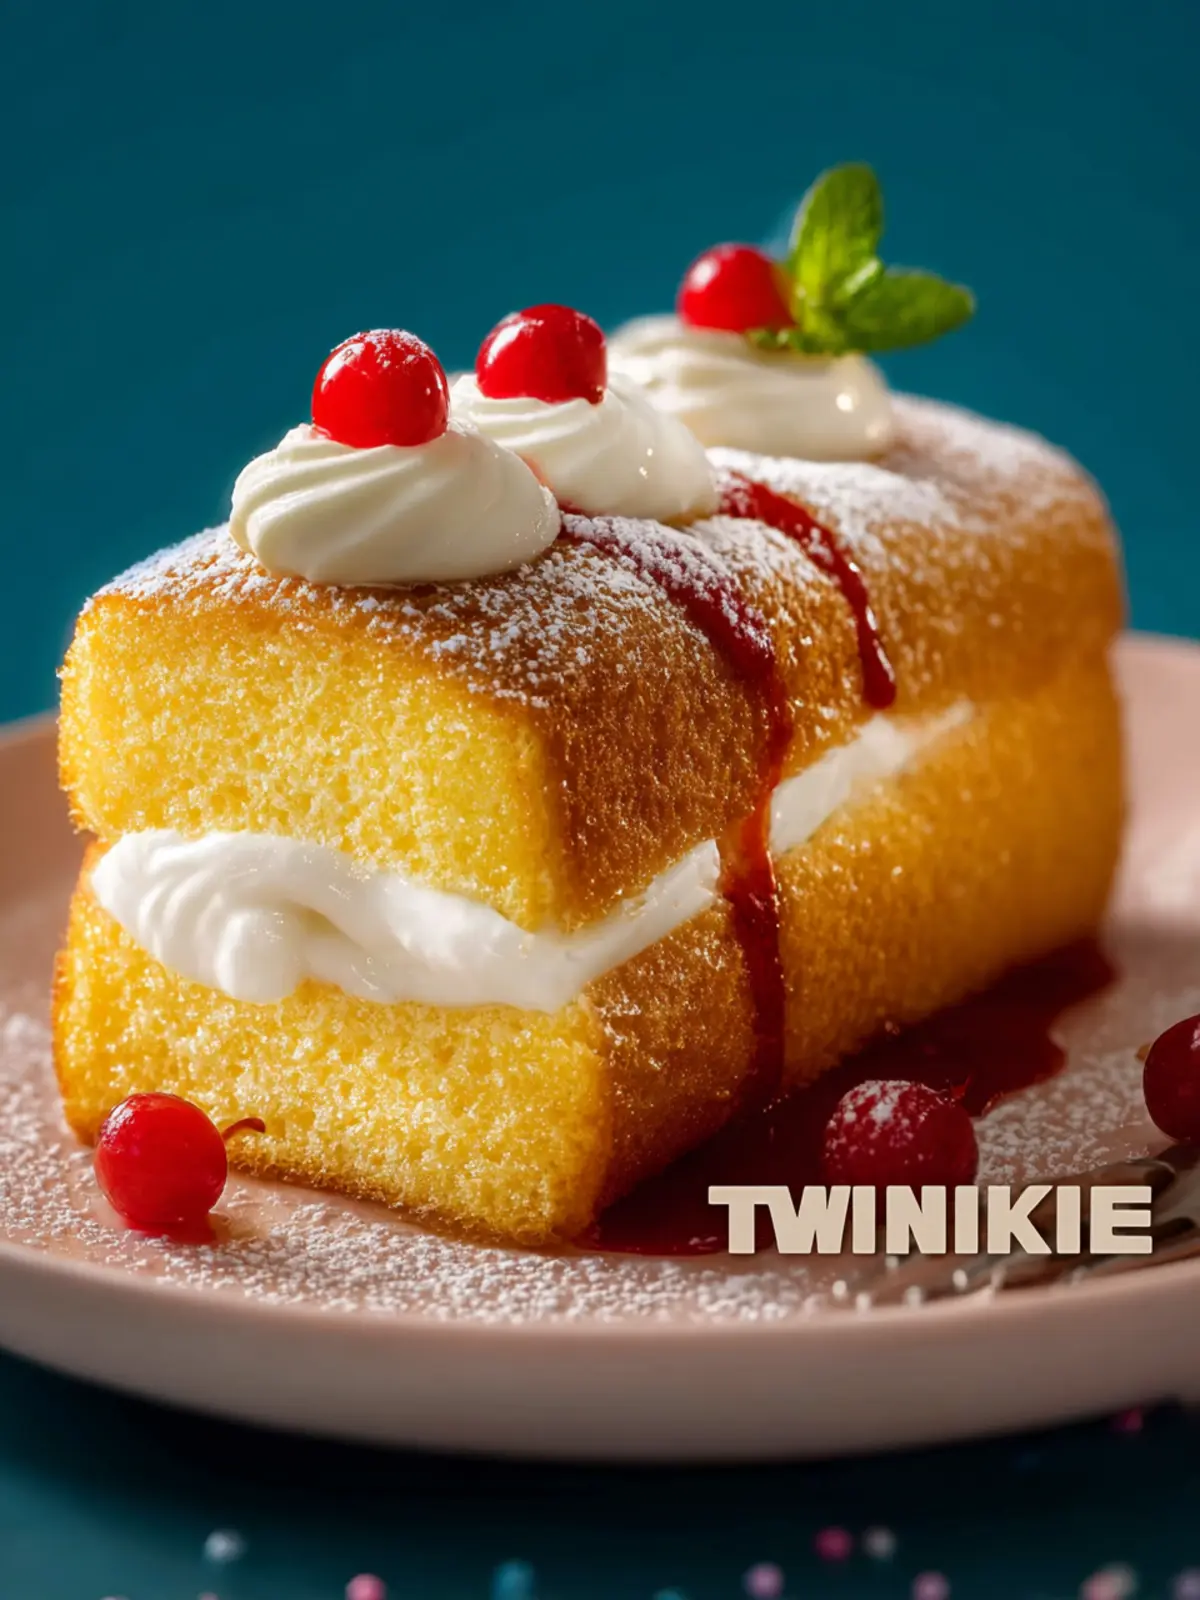
Homemade Twinkie Cake: The Best Indulgence You’ll Crave
Introduction to Homemade Twinkie Cake
Imagine the first bite of a Homemade Twinkie Cake, where the rich, creamy filling and the soft, velvety cake blend into one delightful experience. This nostalgic treat evokes memories of childhood lunchboxes and after-school snacks, transporting us back to simpler times when sweets were simply a joy and not just a treat. The essence of this cake is more than just its flavor; it carries the weight of cherished memories.
Embracing the art of making a Homemade Twinkie Cake allows you to relive those moments while creating new ones. Picture a sunny afternoon, the smell of vanilla wafting through your kitchen, laughter echoing as friends and family gather around to enjoy a slice of nostalgia. The joy of baking isn’t just about the end product; it’s the stories and connections we forge along the way.
Why does nostalgia play such a strong role in our love for cake?
Nostalgia is a powerful emotion. The taste of cake often connects us to significant moments in our lives, from birthdays to festive holidays. Studies suggest that food can trigger vivid memories, making us feel comforted and safe. A well-known saying goes, “You can’t go home again,” but when it comes to cake, each slice can create a portal back to times long past.
Diving into the familiar flavors of a Homemade Twinkie Cake can spark warm feelings of affection for the past, igniting joy even in the busiest of lives. When you indulge in this cake, you’re not just celebrating the recipe; you’re celebrating your history, forging new traditions, and cherishing the smiles that follow with each forkful.
So why not gather your loved ones, dust off your baking apron, and create something magical? By making this Homemade Twinkie Cake, you’re not just making a dessert—you’re crafting a worthwhile experience. Let’s get started on this delightful journey!
Key Ingredients for Homemade Twinkie Cake
Homemade Twinkie Cake not only delivers nostalgia but also brings a delicious twist to a classic treat. Let’s dive into the key ingredients that make this cake so wonderfully irresistible!
Yellow Cake Mix
The backbone of our homemade Twinkie cake is a reliable yellow cake mix. It delivers a light and fluffy texture that complements our cream filling perfectly. Using a box mix also saves time, allowing you more moments to enjoy the baking process.
Eggs
Eggs are essential for binding our ingredients together and providing structure. They add moisture and richness to the cake, ultimately contributing to a tender crumb. I always recommend using large eggs for consistent results.
Unsalted Butter
Butter brings richness and a beautiful flavor to your cake. I prefer unsalted butter, as it allows you to control the saltiness of your dessert, which is key in balancing all the flavors.
2% Milk
Using 2% milk keeps the cake moist while giving it a slight creaminess. It’s a great choice for achieving that tender crumb we all love.
All-Purpose Flour
While we’re utilizing cake mix for convenience, I sometimes enhance the texture by adding a bit of all-purpose flour. This helps to give the cake a homemade feel and improve its structure.
Shortening
Incorporating shortening can lend a softness that butter alone can’t achieve. It helps the cake maintain its moistness and enhances its shelf life.
Vanilla Extract
A splash of high-quality vanilla extract brings warmth and depth of flavor to our cake. It’s an essential ingredient that transports your taste buds straight to sweet childhood memories.
Powdered Sugar
For the filling and frosting, powdered sugar is key. Its fine texture blends smoothly into the cream, giving it a delightful sweetness that pairs perfectly with that iconic cake flavor.
With these ingredients at hand, you’ll be well on your way to crafting a delightful homemade Twinkie cake that will impress friends and family alike!
Why You’ll Love This Homemade Twinkie Cake
Perfect for Any Occasion
Imagine gathering your friends and family around a beautifully decorated table, and there it is—the homemade Twinkie cake, with its eye-catching layers and creamy filling. Whether it’s a birthday party, a casual get-together, or just a Tuesday that needs a bit of sweetness, this cake fits the bill perfectly. Its nostalgic charm appeals to both adults reminiscing about childhood treats and kids who are tasting it for the first time.
Easy to Make
You’ll appreciate how simple it is to whip up this delightful dessert. With straightforward ingredients and minimal steps, this recipe invites even the most novice bakers to get involved. The joy of baking together can turn any day into a memorable occasion. Plus, who doesn’t love the satisfaction of creating something delicious from scratch?
Nostalgic Flavor
Biting into a slice of this cake takes you right back to the days of your youth. The rich vanilla flavor mingled with luscious cream will evoke memories of opening a Twinkie after a long day at school. This homemade Twinkie cake encapsulates that same flavor but with an elevated touch. It’s comforting, familiar, and always hits the sweet spot, making it a treat you’ll cherish time and time again.
You’ll soon see why this cake isn’t just a dessert; it’s an experience!
Tips for Making the Perfect Homemade Twinkie Cake
Creating a delightful homemade Twinkie cake is a fun baking adventure, but the key to success lies in a few helpful tips. Whether you’re a seasoned baker or a novice, this guide will ensure your cake is light, moist, and perfectly frosted.
Baking Tips
- Use Fresh Ingredients: Ensure your eggs and butter are at room temperature before mixing. This helps create a smoother batter and contributes to a fluffier cake.
- Be Precise with Measurements: Baking is a science! Use a kitchen scale or measuring cups accurately to avoid discrepancies that could affect the final texture.
- Avoid Overmixing: Once you add the dry ingredients, mix just until combined. Overmixing can lead to a tough cake.
Frosting Techniques
- Chill the Cake: Allow the cake to cool completely before frosted. A cold cake holds frosting better without sliding off.
- Use a Piping Bag: For that signature Twinkie look, fill a piping bag with your frosting mix and create those signature swirls on top.
Troubleshooting Common Issues
- Cake Sinking in the Middle: This could be due to underbaking or using too much leavening agent. Always check for doneness with a toothpick before removing from the oven.
- Frosting Too Runny: If your frosting isn’t thick enough, add powdered sugar gradually until you reach the desired consistency.
With these tips, your homemade Twinkie cake will impress both in taste and presentation, making it a crowd-pleaser at any gathering. Happy baking!
Time Breakdown for Making Homemade Twinkie Cake
Creating a delectable homemade Twinkie cake isn’t just about the final product; it’s about enjoying the journey in your kitchen. Let’s break down the time needed for each essential stage to ensure you savor every moment of the experience.
Preparation Time
First up, get ready to spend about 20 minutes gathering your ingredients and mixing the batter. This is where you can truly personalize your cake, so take your time!
Baking Time
Once it’s in the oven, you’ll need to allocate 30 to 35 minutes for baking. Make sure to keep an eye on it — that golden hue means it’s nearly ready!
Cooling Time
After baking, let your homemade Twinkie cake cool for at least 15 minutes before frosting. This cooling period is crucial for achieving that perfect texture and flavor.
With this time breakdown in hand, you’re all set to create a delightful cake that will shine at any gathering!

Nutritional Information for Homemade Twinkie Cake
When you relish a slice of homemade Twinkie cake, it’s not just a delightful dessert—it’s a treat that balances taste and nutrition, bringing smiles to everyone at the table.
Calories
A standard serving of homemade Twinkie cake contains about 350 calories. This caloric average varies depending on specific ingredients and serving sizes, especially if you indulge in a thicker slice!
Alternates for Health Considerations
If you’re mindful of your dietary needs, consider these alternatives:
- Sugar Substitutes: Use honey or stevia for a lighter sweetness.
- Flour: Swap out all-purpose flour for almond or coconut flour for a gluten-free version.
- Fat Reduction: Consider using applesauce in place of butter to reduce calories while keeping the cake moist.
- Dairy-Free: Use plant-based milk and yogurt to cater to dairy sensitivities.
With these options, you can enjoy your cake and customize it to fit your lifestyle!
FAQs about Homemade Twinkie Cake
Homemade Twinkie Cake is a nostalgic delight that brings back memories of childhood treats with each luscious bite. Understanding your queries can enhance your baking journey and help you create the best version of this delectable dessert. Here are some commonly asked questions that might help elevate your homemade Twinkie cake experience.
Can I make this cake in advance?
Absolutely! In fact, making your homemade Twinkie cake a day ahead can enhance the flavors as they meld together. Simply bake, allow it to cool completely, and then wrap the cake tightly in plastic wrap to retain its moisture. Store it in the refrigerator. When you’re ready to serve, you can either serve it chilled or let it come to room temperature for a soft, delightful texture.
What if I want to change the flavor?
Customization is part of the fun! While the classic homemade Twinkie cake recipe offers a rich vanilla flavor, feel free to experiment. You can substitute vanilla extract with almond extract for a unique twist or incorporate citrus zest for a fresh aroma. Want it chocolatey? Replace some of the flour with cocoa powder for a rich chocolate version. Just remember that any changes may alter the texture slightly, so adjust your baking time accordingly.
Tips for Decorating and Serving
Decorating your homemade Twinkie cake can turn it from delicious to stunning. Here are some ideas:
- Frosting: A classic buttercream or whipped cream frosting can elevate the cake’s appeal.
- Sprinkles: Add colorful sprinkles or crushed candies on top for a festive look.
- Presentation: Serve slices on colorful plates and garnish with fresh berries for a pop of color.
Remember, the key to an impressive presentation is to keep it simple yet elegant!
Happy baking!
Conclusion on Homemade Twinkie Cake
Celebrate Through Baking
Baking a homemade Twinkie cake is not just about the delicious flavors; it’s a way to create lasting memories. Imagine gathering around the kitchen with friends, laughter mixing with the sweet aroma of vanilla and cream. This cake is perfect for any occasion, from birthdays to casual get-togethers. By making it at home, you can customize flavors and decorations, adding a personal touch that store-bought versions simply can’t match. So, roll up your sleeves, unleash your creativity, and celebrate life through baking—a slice of joy awaits you with every bite of your very own homemade Twinkie cake!
Print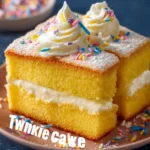
Yellow Cake with Whipped Frosting
- Total Time: 1 hour
- Yield: 8 servings 1x
- Diet: Vegetarian
Description
A delicious yellow cake recipe perfect for any celebration.
Ingredients
Scale
- 1 box (15 ounces) yellow cake mix
- 4 large eggs
- 1 cup unsalted butter (melted)
- 1 ¼ cups 2% milk
- 5 tablespoons all purpose flour
- 1 cup 2% milk (or whole milk)
- ½ cup shortening
- ½ cup unsalted butter (room temperature)
- ½ teaspoon salt
- 1 teaspoon vanilla extract
- 1 cup granulated sugar
- Powdered sugar (for dusting)
Instructions
- Preheat the oven to 325º Fahrenheit for dark pans or 350º Fahrenheit for light or glass pans. Spray the bottom of 2 9” square cake pans with cooking spray, then line the pans with parchment paper.
- Mix cake mix, eggs, melted butter, and 1 ¼ cups milk in a large bowl using a mixer on medium speed. Scrape the bowl as needed. Beat for about two minutes.
- Divide the batter evenly between the two prepared pans. Bake for 30 minutes or until the center of the cake springs back when touched.
- Allow the cakes to cool in the pan for 5 minutes, then remove them to a wire rack to cool completely.
- In a small saucepan over medium low heat, cook the flour and 1 cup of milk together, whisking constantly, until the mixture thickens to a pudding consistency.
- Remove from heat and allow to cool completely.
- Using a mixer, cream the shortening, room temperature butter, salt, and vanilla until smooth. Scrape the sides of the bowl as needed. Add in the sugar and beat for 2 minutes.
- Add in the cooled flour mixture. Beat until the mixture becomes fluffy like whipped cream.
- If the cakes have domes, level them off with a large knife.
- Place one cake layer on a plate and spread all of the whipped frosting over it. Place the second cake layer on top and dust with powdered sugar.
Notes
- For best results, let the frosted cake sit for a few minutes before serving to let the flavors meld.
- This cake can be made a day in advance.
- Prep Time: 20 minutes
- Cook Time: 30 minutes
- Category: Desserts
- Method: Baking
- Cuisine: American
Nutrition
- Serving Size: 1 slice
- Calories: 350
- Sugar: 25g
- Sodium: 150mg
- Fat: 15g
- Saturated Fat: 8g
- Unsaturated Fat: 5g
- Trans Fat: 0g
- Carbohydrates: 45g
- Fiber: 1g
- Protein: 4g
- Cholesterol: 60mg