Follow Me On Social Media!


Classic Homemade Dinner Rolls You’ll Love Every Bite Of
Introduction to Classic Homemade Dinner Rolls
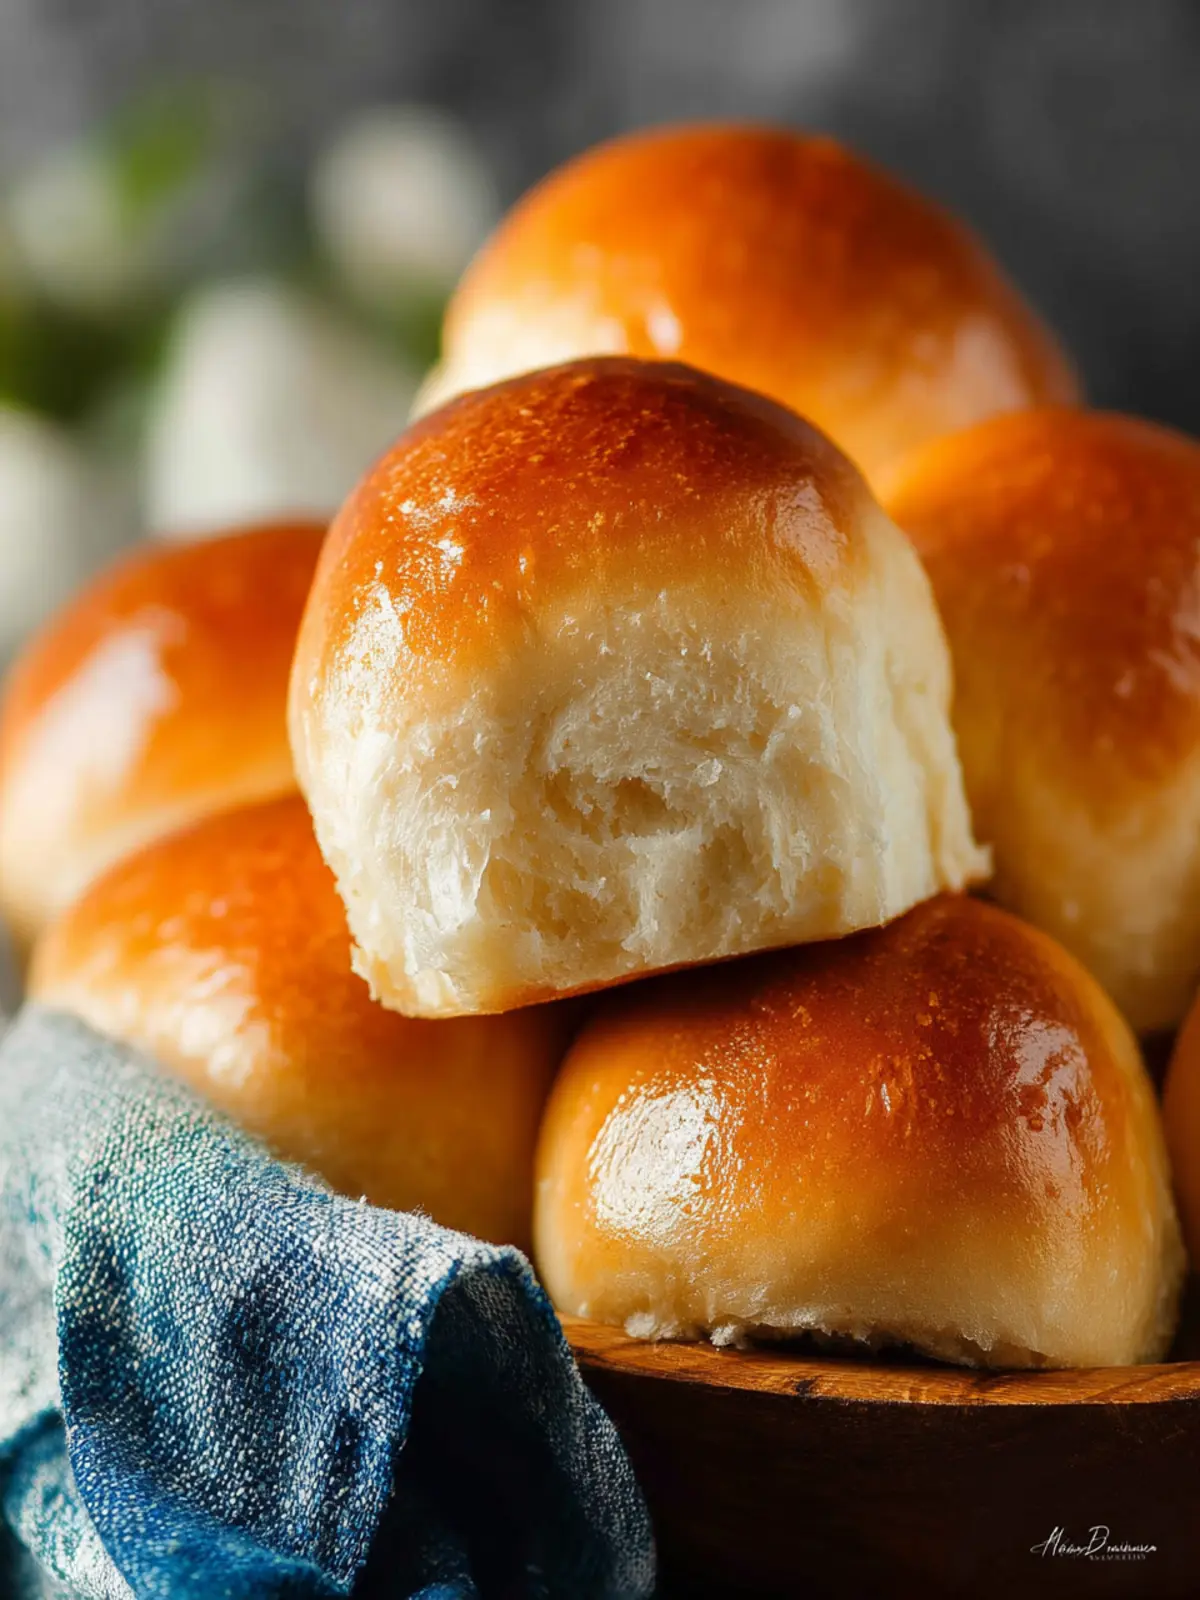
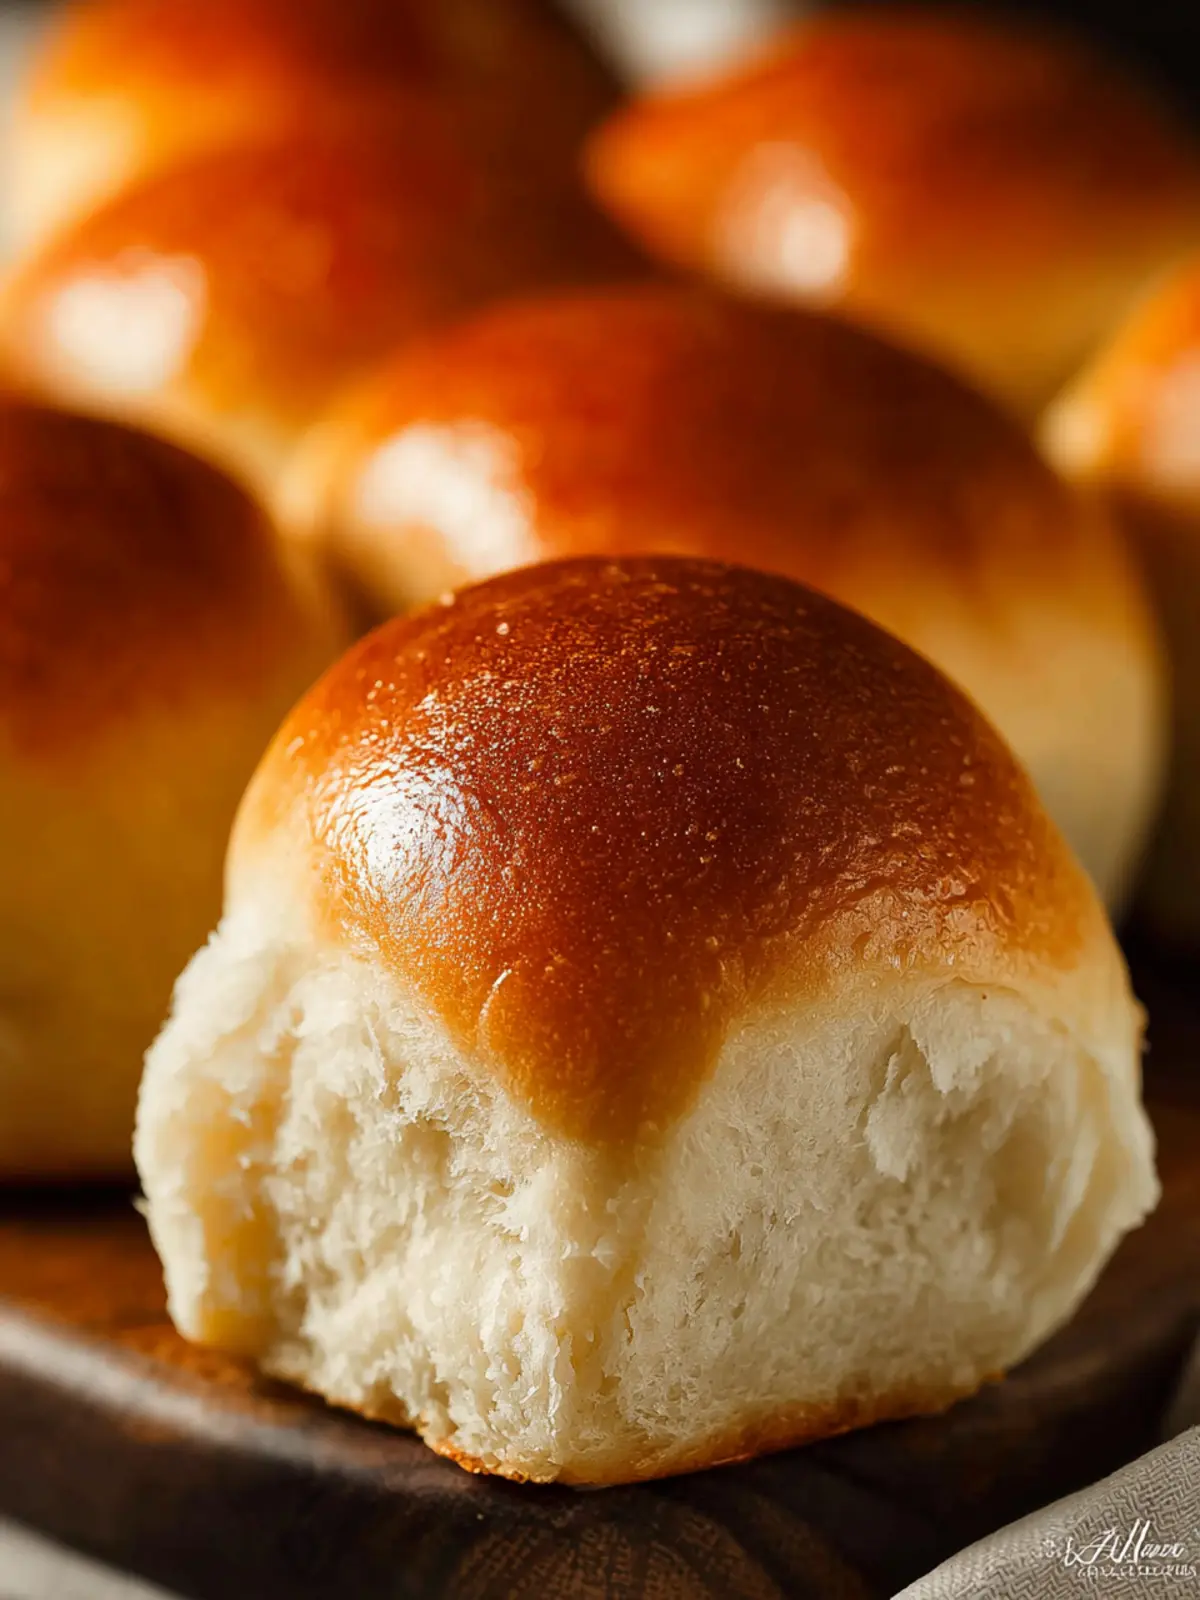
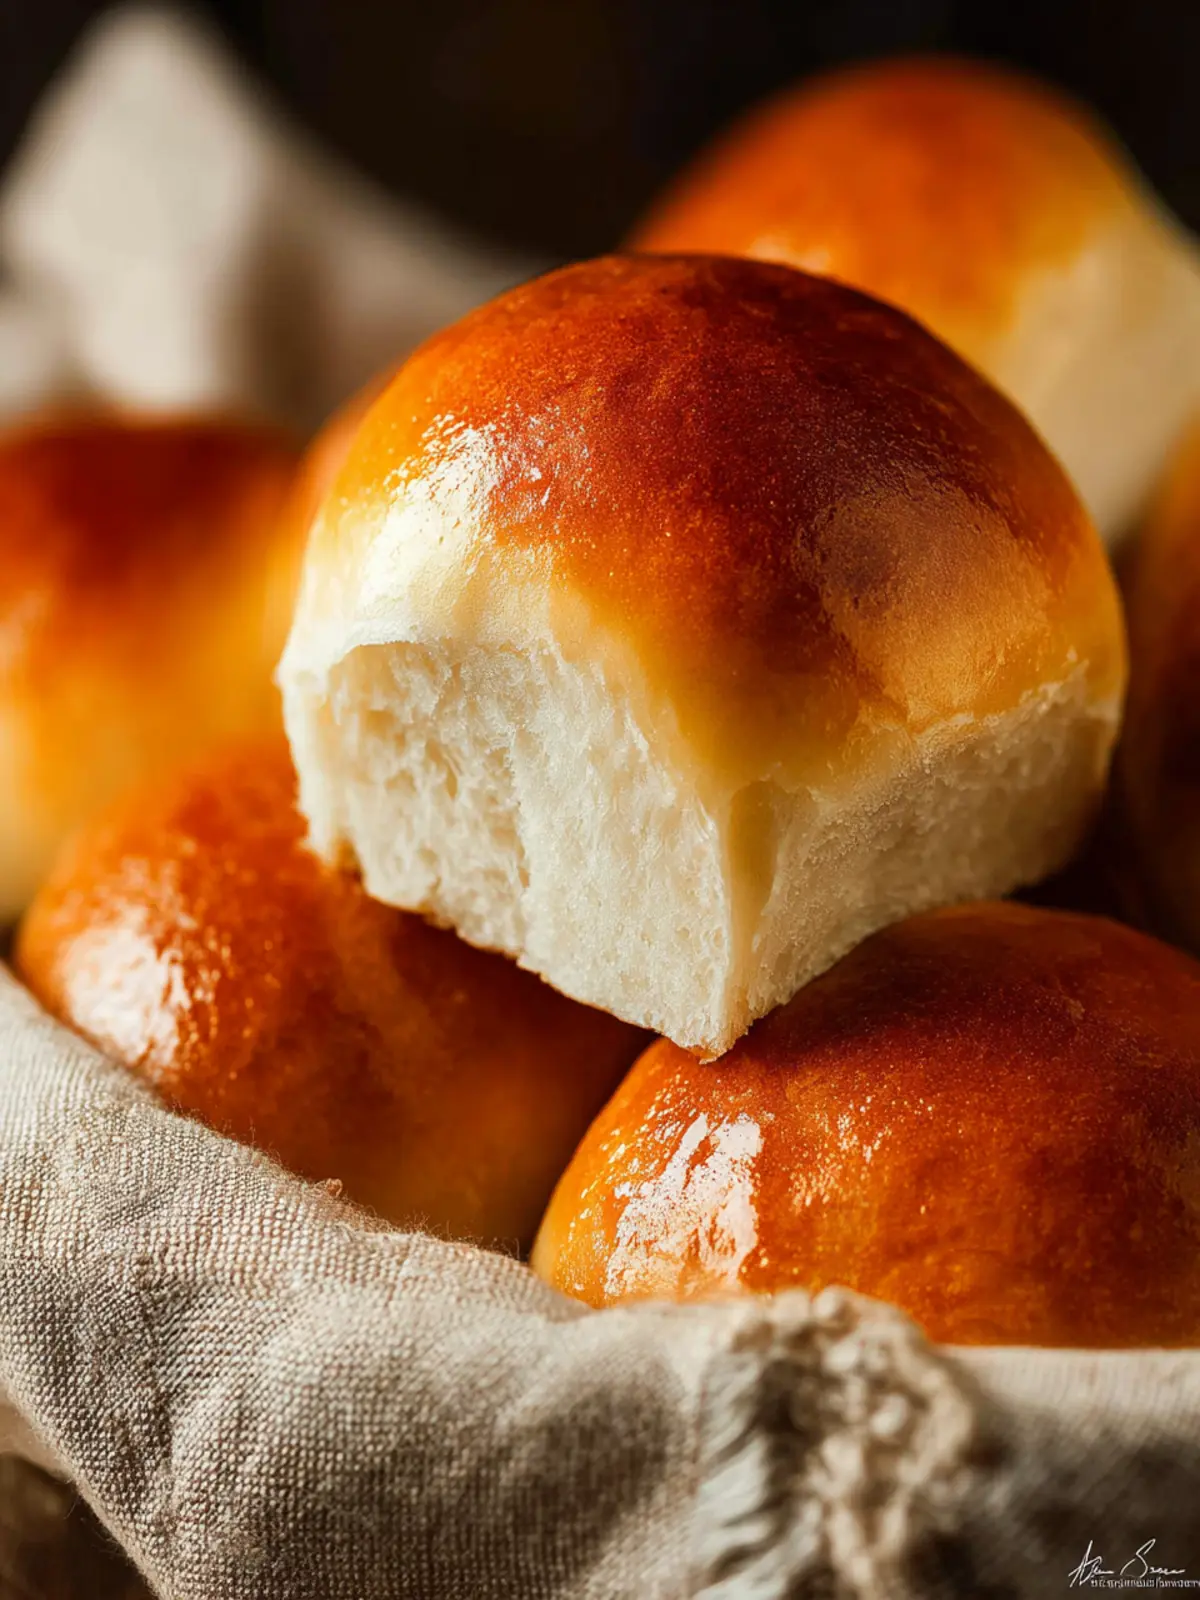
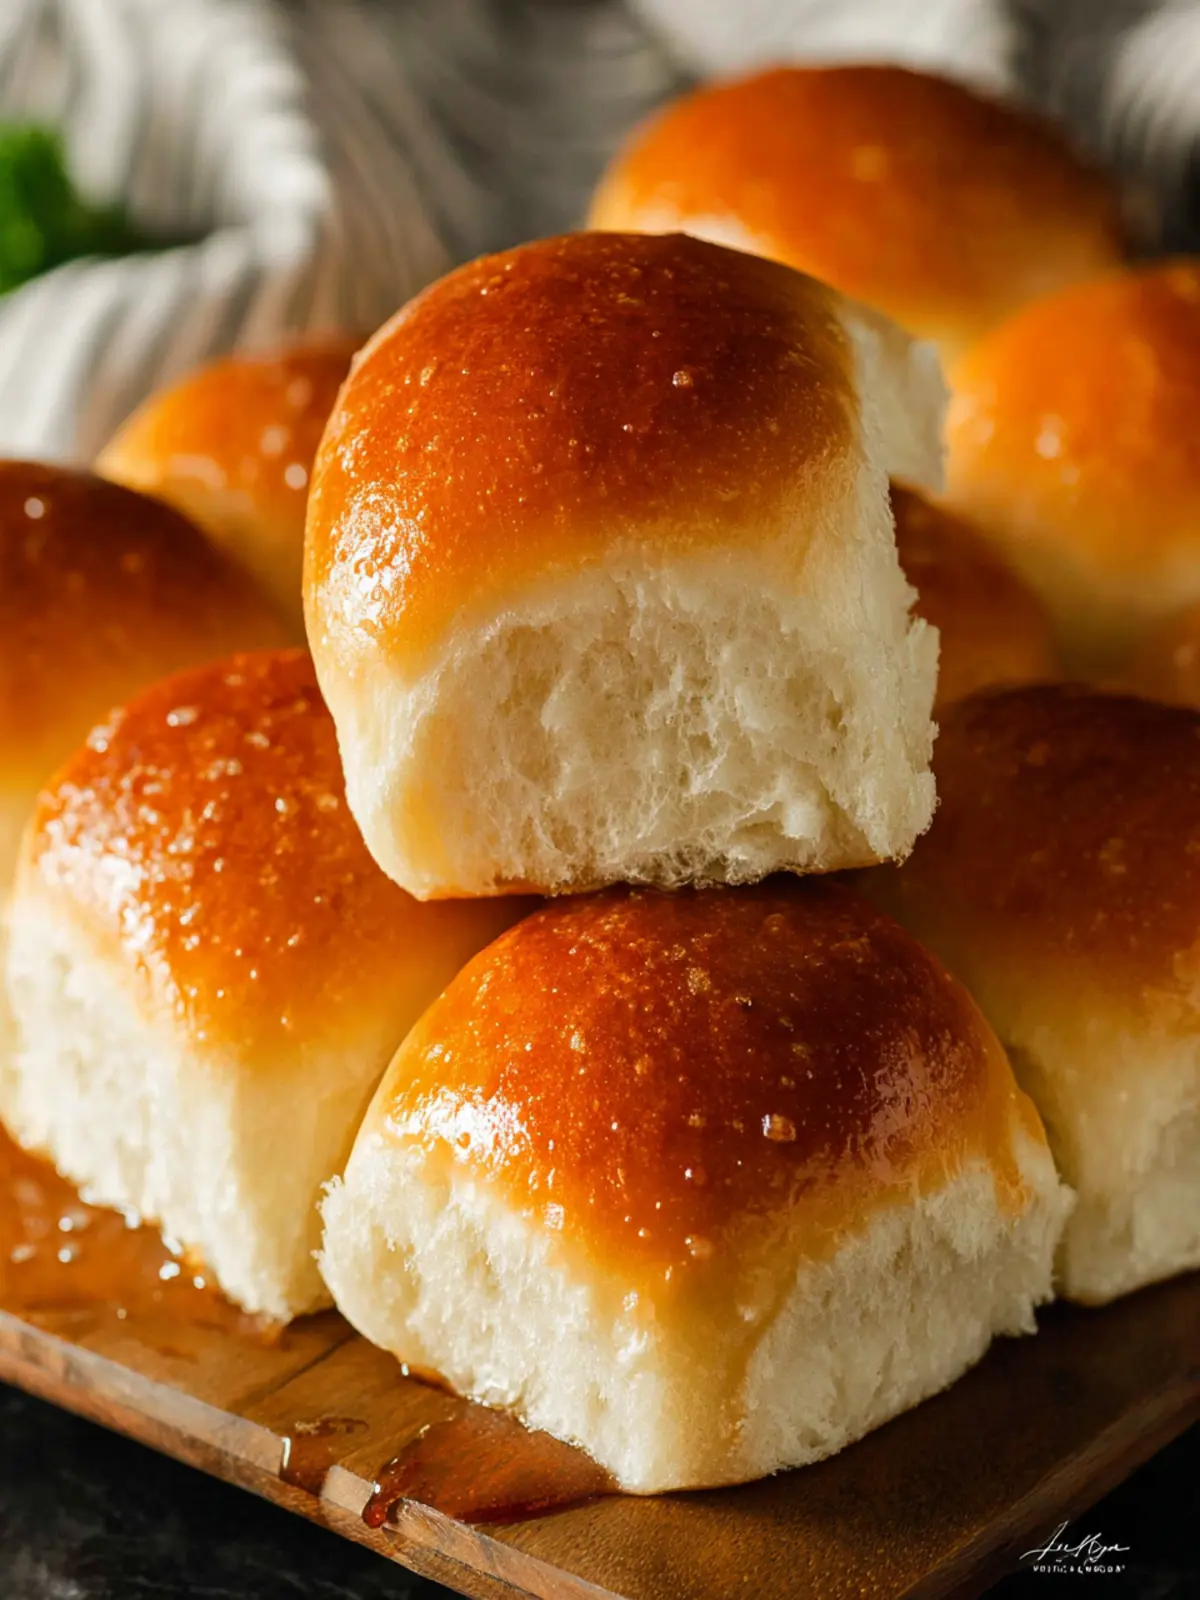
There’s something truly magical about the aroma of Classic Homemade Dinner Rolls wafting through your kitchen; it evokes memories of family gatherings, warm kitchen counters, and comforting meals. Imagine the feeling as you pull those fluffy rolls from the oven—the golden crust crackling as you tear one open, revealing a soft, pillowy interior just waiting to be slathered with butter. It’s these moments, brimming with warmth and togetherness, that lend a special charm to homemade dinner rolls.
What makes homemade dinner rolls so special? Well, it’s all in the ingredients and the process. From selecting high-quality flour to allowing your dough to rise to perfection, every step brings you closer to that blissful bite. Unlike store-bought varieties, homemade rolls allow you to control the flavors, textures, and, yes, even the love that goes into the dough. The act of kneading, watching the dough rise, and ultimately shaping each roll are all steps that you imbue with your personality—transforming simple ingredients into a heartwarming staple for any meal.
The Comfort of Classic Homemade Dinner Rolls
Homemade dinner rolls serve not just as a side dish but as a centerpiece of conversation. They elicit smiles, provoke stories, and invite second helpings. Whether you’re hosting a dinner party, gathering around the family table for the holidays, or just treating yourself after a long week, these rolls are a delicious way to enhance those moments.
Fluffy, warm, and slightly sweet, Classic Homemade Dinner Rolls offer versatility—perfect for soaking up gravy or even enjoying on their own with a dash of honey. Plus, the sense of achievement from baking a batch is unparalleled. If you’ve never tried making dinner rolls at home, this recipe invites you into a world where every bite is made with care and every gathering feels a bit more special. So grab your apron, roll up your sleeves, and let’s dive into the delightful process of baking these cherished rolls together!
Key Ingredients for Classic Homemade Dinner Rolls
Creating Classic Homemade Dinner Rolls is a delightful experience that fills your kitchen with warmth and inviting aromas. Each ingredient plays a vital role in crafting rolls that are soft, fluffy, and simply irresistible.
Flour: All-purpose flour serves as the backbone of these dinner rolls. It provides the right amount of structure for that puffy texture. If you want an extra light touch, feel free to experiment with bread flour, which offers a higher protein content.
Yeast: Fresh yeast brings your rolls to life. Active dry yeast is preferred for its reliability, ensuring that your rolls rise beautifully. It’s essential to activate it correctly for optimal puffiness.
Milk: Using warm milk creates a richer flavor and helps with activating the yeast. Whole milk is ideal, but you can use almond or oat milk for a dairy-free option.
Butter: Softened butter adds richness and flavor, making your rolls irresistible. It’s not just for taste; it also helps the dough achieve the perfect texture.
Sugar: A pinch of sugar feeds the yeast for a better rise and provides a subtle sweetness that balances the flavor of the rolls.
Eggs: Eggs enhance the dough’s strength and moisture, resulting in light and fluffy rolls. Make sure they are at room temperature for the best incorporation.
Salt: Most importantly, salt elevates the flavors in your dinner rolls and keeps the fermentation process in check, preventing over-rising.
Why You’ll Love These Dinner Rolls
There’s something truly magical about Classic Homemade Dinner Rolls. Imagine walking into your kitchen, the inviting aroma of freshly baked bread wrapping around you like a warm hug. These rolls are not just a side dish; they’re an experience, a comforting staple often linked to family gatherings and cozy dinners.
Irresistible Fluffiness
Every bite of these rolls transports you to bread heaven. The secret lies in the dough’s perfect rise—thanks to the active yeast and a touch of sugar, which work together to create that fluffy, pillowy texture we all adore. The combination of soft interior with a slight golden crust leaves your taste buds dancing with joy.
Versatile Accompaniment
These rolls are incredibly versatile. Whether served alone with a pat of butter or used to soak up delicious gravy, they elevate any meal. Think about your next dinner party or family gathering—these rolls will be the show-stealer. They even freeze well, so you can make a batch ahead of time and pop them in the oven whenever the craving strikes.
Easy to Make
Don’t worry if you’re not a baking expert. The step-by-step instructions break the process down into manageable tasks. With just a few simple ingredients like flour, milk, and butter, you’ll be rewarded with warm, golden rolls sure to impress.
Once you try Classic Homemade Dinner Rolls, you’ll wonder how you ever lived without them.
Variations on Classic Dinner Rolls
When you think about Classic Homemade Dinner Rolls, you might picture soft, fluffy rolls that are perfect for mopping up gravies or buttering warm. But why stop there? There are so many delightful ways to switch up these beloved rolls to fit your mood or occasion.
Herb-Infused Rolls: Lemon thyme or rosemary can elevate your standard dinner roll into a gourmet treat. Simply mix in chopped fresh herbs when you combine your dry ingredients for a fragrant, flavorful twist.
Garlic Butter Rolls: If you’re a garlic lover, this variation is for you. Before baking, brush the tops of your rolls with melted garlic butter. The result? A savory, aromatic roll that pairs beautifully with pasta dishes or soups.
Cheesy Dinner Rolls: Incorporate shredded cheese—like cheddar or mozzarella—into the dough for a gooey surprise in each bite. They’ll be a hit at any family gathering.
Sweet Cinnamon Rolls: Want to indulge your sweet tooth? Before rolling, sprinkle your dough with a mixture of sugar, cinnamon, and a drizzle of brown sugar. Bake them as you normally would, and you’ll have soft, sweet rolls that are simply irresistible.
Adapting Classic Homemade Dinner Rolls to your tastes not only makes dinner exciting but also allows you to express your creativity in the kitchen. Happy baking!
Cooking Tips and Notes for Dinner Rolls
Every time I whip up a batch of classic homemade dinner rolls, I’m transported back to my childhood kitchen, where the warm aroma of fresh bread made everyone feel at home. If you want to create the same magical experience in your own kitchen, there are a few key tips to keep in mind.
The Right Temperature Matters
Yeast is a fickle friend. Using water that’s too hot will kill it, while water that’s too cold won’t activate it. Aim for about 110°F, which is just warm enough to help that dough rise beautifully.
Kneading Technique
Kneading helps develop gluten, which gives your rolls their structure. Don’t rush this step. Aim for a good 8-10 minutes of kneading until your dough is smooth and elastic. Remember, this is where your muscles will thank you!
Second Rise
Patience is key! Allow the dough to rise twice. The first rise lets the yeast do its work, while the second rise adds that fluffy texture we crave in classic homemade dinner rolls.
Baking and Brushing
Brush with melted butter before baking for a beautiful, golden crust. If you’re feeling adventurous, adding herbs or garlic to that butter can elevate your rolls to a new delicious level.
With these tips, you’re on your way to crafting the most delightful dinner rolls that will have your friends and family coming back for seconds!
Serving Suggestions for Homemade Dinner Rolls
When you pull a batch of Classic Homemade Dinner Rolls from the oven, the aroma wafting through your kitchen is enough to make anyone’s mouth water. These soft, fluffy rolls are versatile and can complement any meal. Here are a few serving suggestions to elevate your dining experience:
-
Slathered with Fresh Butter: There’s nothing quite like warm dinner rolls spread with a generous pat of creamy butter. It melts beautifully and adds a rich flavor that enhances the roll’s softness.
-
With Jam or Honey: For a sweet twist, serve your rolls with a selection of homemade jams or a drizzle of honey. This pairing makes for a delightful breakfast or brunch option.
-
As Sandwich Buns: Transform your rolls into mini sandwiches for lunch. Stuff them with deli meats, cheeses, and fresh veggies for a simple yet satisfying meal.
-
Accompanying Soups or Salads: For a hearty dinner, serve these rolls alongside your favorite soup or salad. They’re perfect for dunking or soaking up flavorful broth.
Each of these options lets the Classic Homemade Dinner Rolls shine, making your meals even more enjoyable. So, how do you plan to enjoy yours?
Time Breakdown for Making Dinner Rolls
Creating Classic Homemade Dinner Rolls is a rewarding experience that transforms your kitchen into a warm, inviting space. With each stage of the process, anticipation builds for that first fluffy bite. Here’s a concise breakdown of the time involved to help you plan your baking adventure.
Preparation Time
First, set aside about 15 minutes for preparation. This includes gathering your ingredients and mixing them together to create that lovely dough.
Rising Time
Next, the dough needs time to rise. Allow it to rest for approximately 1 hour, giving it the opportunity to double in size. This crucial step creates that light and airy texture we love in dinner rolls.
Baking Time
When ready, bake your rolls for about 20 minutes. You’ll know they’re done when they’re golden brown and emit a tantalizing aroma!
Total Time
In total, you’re looking at about 1 hour and 35 minutes from start to finish. In under two hours, your Classic Homemade Dinner Rolls will be ready to impress!
Nutritional Facts for Classic Dinner Rolls
When crafting Classic Homemade Dinner Rolls, understanding their nutritional aspects can elevate your dining experience. These rolls are not just delicious; they’re a delightful addition to any meal. Here’s a breakdown of the key nutritional facts that make them even more appealing:
Calories
A single roll contains approximately 100-120 calories, making them a tasty, moderate addition to your meal without overwhelming your calorie count.
Carbohydrates
Each roll packs about 20-25 grams of carbohydrates. This provides a quick energy boost, perfect for powering through your day, whether you’re at work or enjoying a cozy dinner.
Protein
You’ll find around 2-4 grams of protein in each roll. While they aren’t a primary protein source, they still contribute a little extra to your daily intake.
Fat
With only 3-5 grams of fat per roll, these dinner rolls are relatively low in fat, especially if you keep the butter for spreading on the side.
Sodium
Each roll contains approximately 150-250 milligrams of sodium, which adds flavor but is something to be mindful of if you’re watching your salt intake.
Enjoy these delightful rolls guilt-free, and let them complement your next meal beautifully!
FAQs about Classic Homemade Dinner Rolls
Creating the perfect Classic Homemade Dinner Rolls can elevate any meal, but questions often arise during this delicious journey. Let’s dive into some common queries to enhance your baking experience!
How can I make my dinner rolls fluffier?
For those seeking ultra-fluffy dinner rolls, consider these tips:
- Active Yeast: Ensure your yeast is fresh and active. It should foam when mixed with warm water and sugar.
- Kneading: Knead the dough thoroughly (about 8-10 minutes) until it’s smooth and elastic. This develops the gluten, creating a wonderful texture.
- Second Rise: Don’t skip the second rise; it allows the rolls to develop more flavor and lightness.
What is the best way to store leftover dinner rolls?
To keep your Classic Homemade Dinner Rolls fresh:
- Cool Completely: Allow the rolls to cool to room temperature before storing.
- Airtight Container: Store them in an airtight container at room temperature to maintain softness.
- Kitchen Towel: Alternatively, you can wrap them in a kitchen towel, placing them in a bread box for optimal freshness.
Can I freeze these dinner rolls?
Absolutely! Freezing is a great way to enjoy your Classic Homemade Dinner Rolls later:
- Wrap: Individually wrap each roll in plastic wrap, then place them in a zip-top bag.
- Defrost: To enjoy, simply thaw them overnight in the refrigerator and warm them gently before serving for that freshly-baked taste.
What can I serve with these dinner rolls?
The beauty of Classic Homemade Dinner Rolls is their versatility. Here are some delicious pairings:
- Soups: Great as a side with creamy soups like clam chowder or minestrone.
- Meats: They complement roasts, glazed ham, or any grilled protein beautifully.
- Dips: Serve with butter, honey, or even herb dips for added deliciousness during meals or gatherings!
Conclusion on Classic Homemade Dinner Rolls
Bringing Classic Homemade Dinner Rolls to your table is a cherished tradition that can transform any meal into a memorable feast. The aroma of freshly baked rolls wafting through your home creates a warm, inviting atmosphere that’s hard to resist. As you enjoy these tender, buttery delights, you not only savor their flavor but also create moments of joy with family and friends.
Don’t hesitate to experiment with this recipe, adding your own twist while honoring the classic techniques. Whether you serve them with a hearty stew or as a side to your favorite pasta, these rolls are a surefire hit. Happy baking!
Print
Homemade Dinner Rolls
- Total Time: 2 hours
- Yield: 15 rolls 1x
- Diet: Vegetarian
Description
Soft and fluffy homemade dinner rolls perfect for any meal.
Ingredients
Scale
- ¾ cup milk (microwaved about 45 seconds until hot chocolate temperature)
- ½ cup softened unsalted butter (or shortening)
- ¼ cup granulated sugar
- 1 tsp salt
- 2 packages active dry yeast (about 5 tsp or 1 Tbsp + 2 tsp)
- ½ cup lukewarm water (110–115°F)
- 4¼ to 4¾ cups sifted all-purpose flour
- 2 large eggs
- 2 Tbsp melted salted butter (for brushing tops)
Instructions
- In a small bowl, combine 2 packages active dry yeast with ½ cup lukewarm water (110–115°F). Stir gently and let sit for 5–10 minutes until the mixture becomes foamy.
- In a large mixing bowl, combine ¾ cup hot milk, ½ cup softened unsalted butter, ¼ cup granulated sugar, and 1 teaspoon salt. Stir until the butter melts and everything is combined. Let the mixture cool until it feels warm but not hot.
- Add 1½ cups all-purpose flour to the milk mixture and beat well by hand or with an electric mixer on low speed for about 1 minute until smooth.
- Add the 2 large eggs and the activated yeast mixture, then mix until fully combined.
- Gradually stir in the remaining 2¾ to 3¼ cups all-purpose flour (for a total of 4¼ to 4¾ cups flour) a little at a time until a soft dough forms that pulls away from the sides of the bowl.
- Turn the dough onto a lightly floured surface and knead for about 8 minutes until the dough becomes smooth, elastic, and no longer sticky.
- Place the dough in a lightly greased bowl, turning once to coat the surface. Cover and let rise in a warm place for 1 to 1½ hours, or until the dough doubles in size.
- Punch down the dough and transfer it to a lightly floured surface. Divide the dough into about 15 rolls. If using a food scale, weigh each piece to about 3 oz (96 g). If not, divide the dough in half, then in half again, and continue dividing until you have about 15–16 pieces.
- Pinch the edges of each piece of dough underneath to create a smooth top. Roll the dough ball gently on the counter using your hand in an “OK” shape to tighten the surface and place the seam on the bottom.
- Place the dough balls seam-side down on a greased baking sheet, brush the tops lightly with melted butter, cover loosely, and let rise for 30–45 minutes until doubled in size.
- Bake in a 375°F oven for 12–15 minutes, or until the tops are golden brown.
- Remove from the oven and immediately brush the rolls with 2 tablespoons melted butter before serving.
Notes
- Ensure the milk is not too hot before combining with other ingredients to avoid killing the yeast.
- For best results, knead the dough until it is smooth and elastic.
- These rolls can be frozen after baking; reheat in the oven before serving.
- Prep Time: 20 minutes
- Cook Time: 15 minutes
- Category: Bread
- Method: Baking
- Cuisine: American
Nutrition
- Serving Size: 1 roll
- Calories: 150
- Sugar: 2g
- Sodium: 200mg
- Fat: 7g
- Saturated Fat: 4g
- Unsaturated Fat: 2g
- Trans Fat: 0g
- Carbohydrates: 20g
- Fiber: 1g
- Protein: 3g
- Cholesterol: 20mg